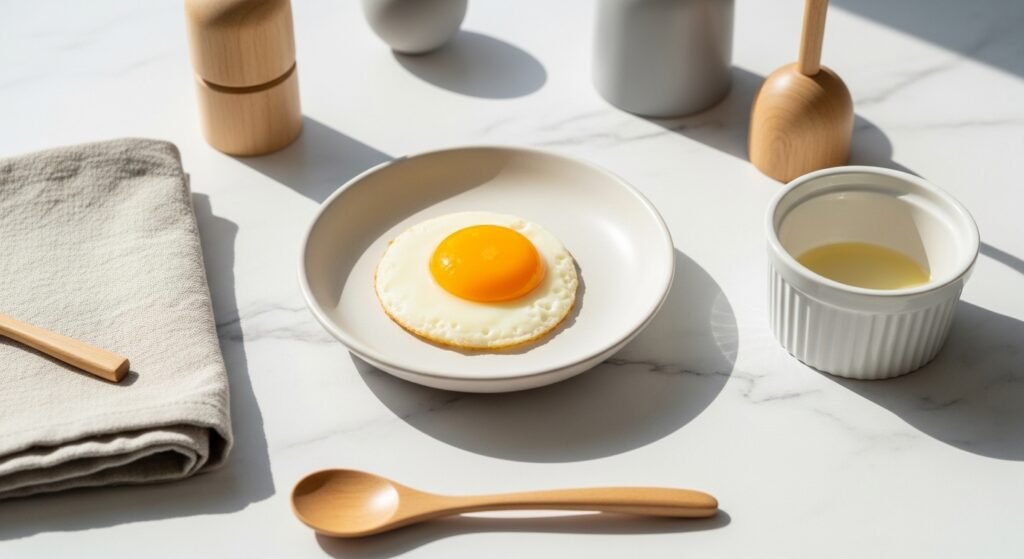
You’re here because your sunny side up eggs keep coming out with burned bottoms or rubbery whites. You’re not alone—many cooks overheat the pan or skip a simple lid step. According to Easy and Delish, the secret is low heat and 2–2½ minutes of gentle cooking; Love and Lemons also recommends a glass lid to steam the whites while keeping yolks runny.
You’ll learn exact temps, timing, and small prep moves that stop burning every time. Grab a non-stick skillet and a glass lid (both save you from sticking and scorching) and let’s get eggs right.
Preview: set up, step-by-step cooking, quick fixes for scorched bottoms, and finishing touches that look pin-worthy.
Prepare your pan and ingredients (set up for success)

- Preheat the pan over low to medium-low heat for 1 minute—don’t blast it. This avoids hot spots that burn the underside.
- Add 1 tsp olive oil or ½ tbsp unsalted butter per egg; swirl to coat. For a neutral, higher smoke point, use avocado oil.
- Crack eggs into small ramekins first so you can gently slide them in without breaking yolks.
- Space eggs at least 1 inch apart to prevent overcrowding, which causes uneven cooking (a frequent reason for burned bottoms).
Quick tip: a silicone spatula at hand helps nudge whites if needed.
Cook slowly, cover to steam whites (master the technique)
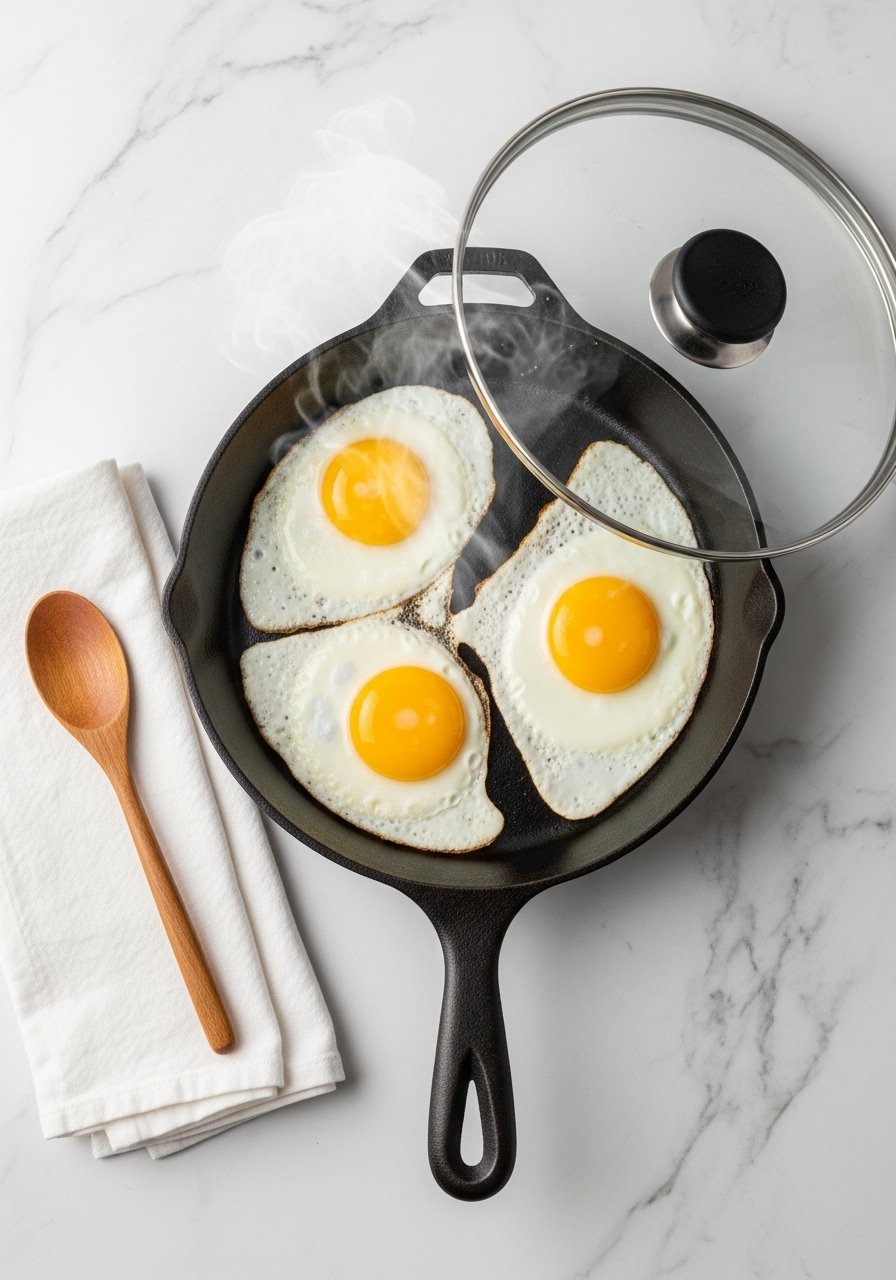
- Once fat shimmers (not smoking), slide eggs from ramekins into the pan.
- Immediately reduce heat to low. This is the step that prevents burned bottoms.
- Cover the pan with your glass lid for about 2–2½ minutes—this steams the whites while yolks stay runny.
- For extra control, tilt the pan slightly and use a spoon to baste hot fat over the edges for firmer whites without overcooking yolks.
What to watch for: if your pan smokes or the edges brown too quickly, lower the burner. Love and Lemons recommends this low-and-covered method specifically to avoid scorching.
Troubleshooting: no more burned bottoms or rubbery whites
- Burned bottom? Try these fixes:
- Move to a lower burner setting immediately and finish covered for 30–60 seconds.
- Use a fresh non-stick surface or a well-seasoned pan—old burnt residue causes sticking.
- Whites too rubbery or yolks overcooked?
- Shorten covered cook time by 15–30 seconds next trial.
- Spoon a teaspoon of water into the edge of the pan and cover to add steam—this softens whites faster.
- Pan too hot at start? Let it cool 30 seconds between batches or preload fat so it protects the surface.
Product help: a splatter screen keeps your stovetop tidy when basting, and flaky sea salt finishes the eggs with bright crunch.
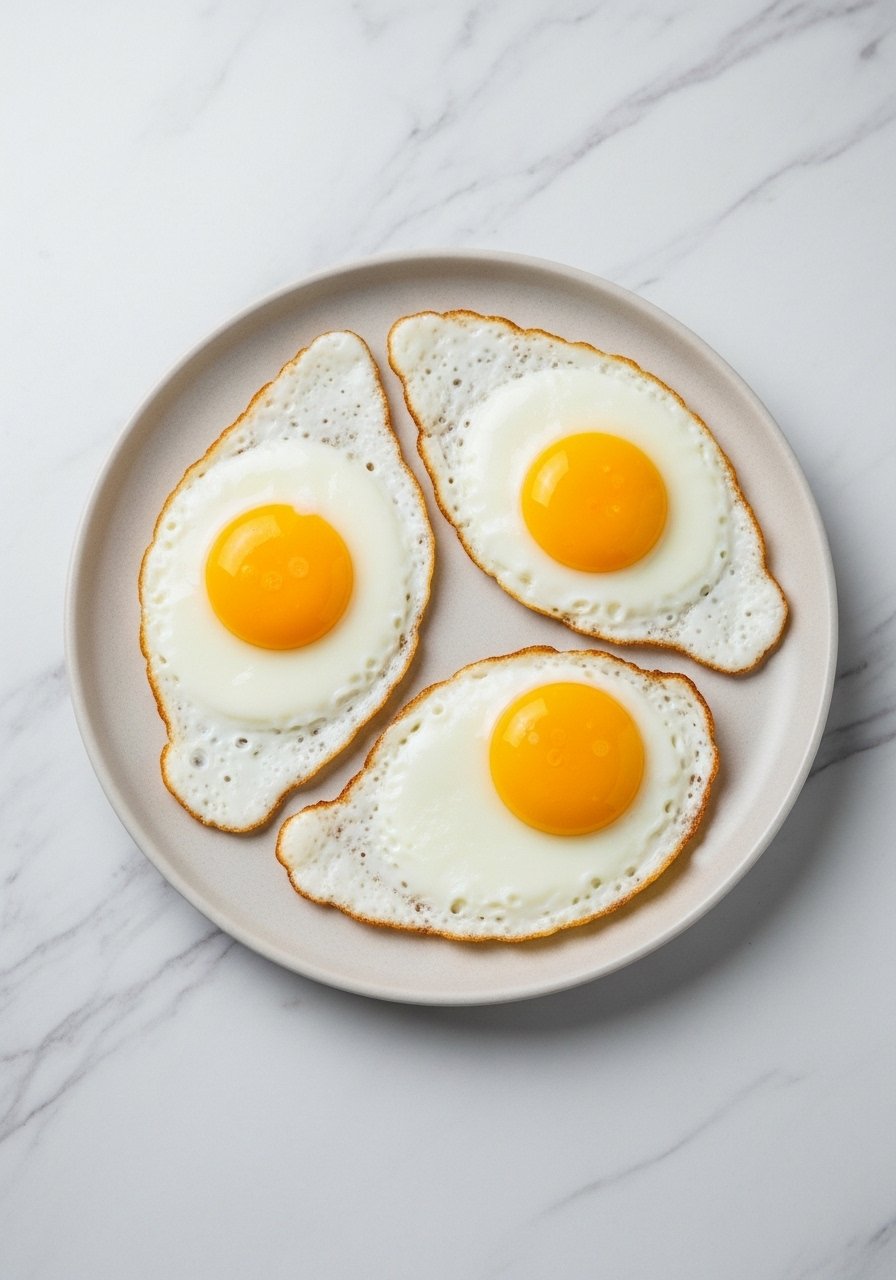
Finish, serve, and store (presentation and quick variations)
- Slide eggs out with a fish spatula for perfect transfer.
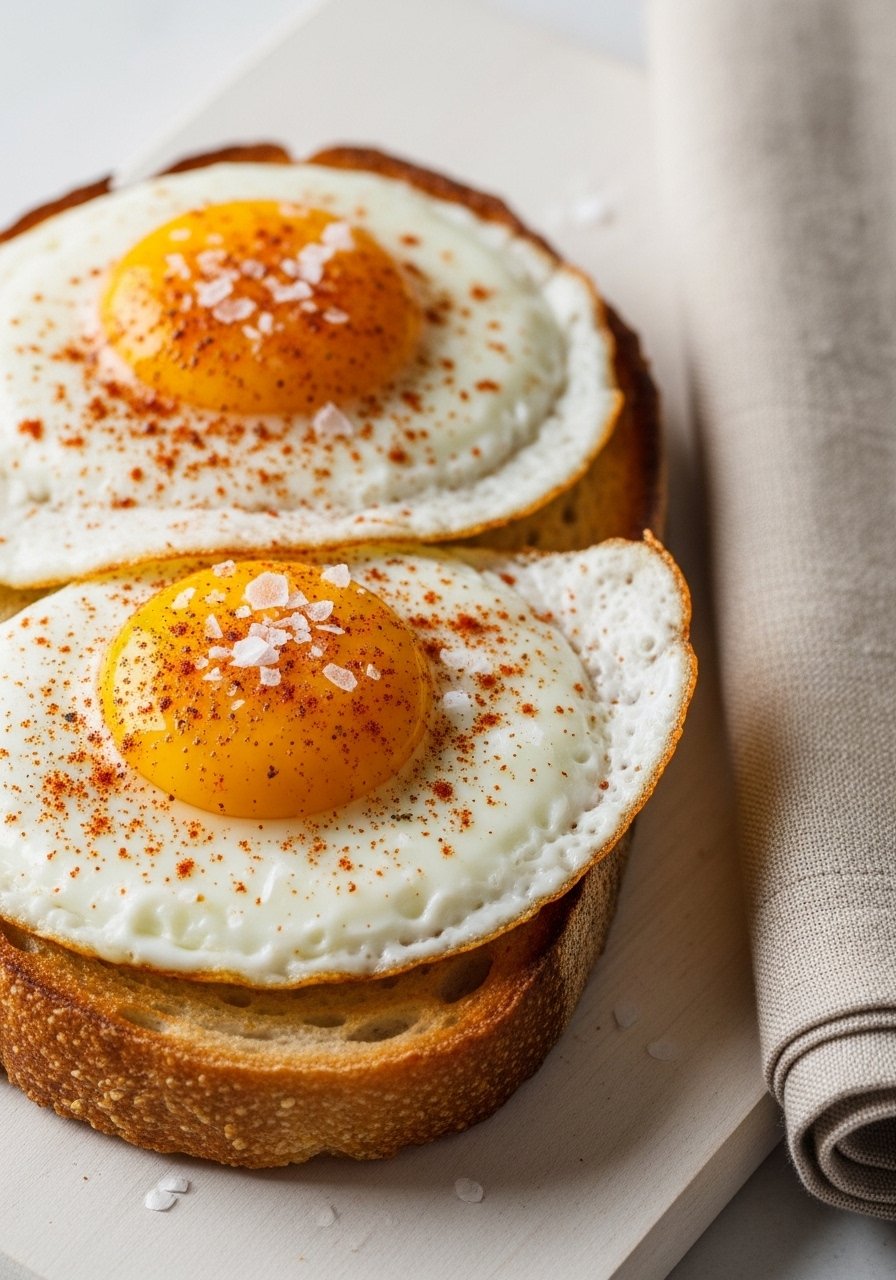
- Season right away with flaky sea salt and cracked black pepper. Try a light dusting of smoked paprika for color.
- Make-ahead tip: cook whites only and refrigerate up to 24 hours; finish covered for 30–45 seconds before serving to warm yolks gently.
- Variation: spoon chili oil or a drizzle of extra virgin olive oil for a flavor twist.
Small serving gear like extra ramekins for condiments makes plating pin-worthy.
Once you lock the low-heat + cover method, you'll stop burning eggs and get that crisp-but-tender white with runny yolks every time. Try the 2–2½ minute window and adjust in 15-second steps.
Ready to try this? Pin this guide so you can use it at the stove, and tell me—which fix will you try first? If you want one tool that makes repeat success easier, pick up a good non-stick skillet and a matching glass lid—they simplify the whole method.