Mornings are hectic — you rush out the door and skip breakfast more often than you’d like. According to a 2024 Food Network survey, about six in ten people say their mornings are too rushed for a homemade meal. If you want a real grab-and-go solution, learning how to make breakfast bars for grab-and-go mornings will change your weekday routine.
You’ll learn to make sturdy, chewy bars that hold up in a tote and taste great cold. A digital kitchen scale keeps portions consistent, and a silicone baking mat prevents sticking and saves cleanup time.
Read on for clear steps, pantry swaps, storage hacks, and quick variations so you can make breakfast bars that travel well and taste like you spent more time than you did.
Preparing Your Ingredients
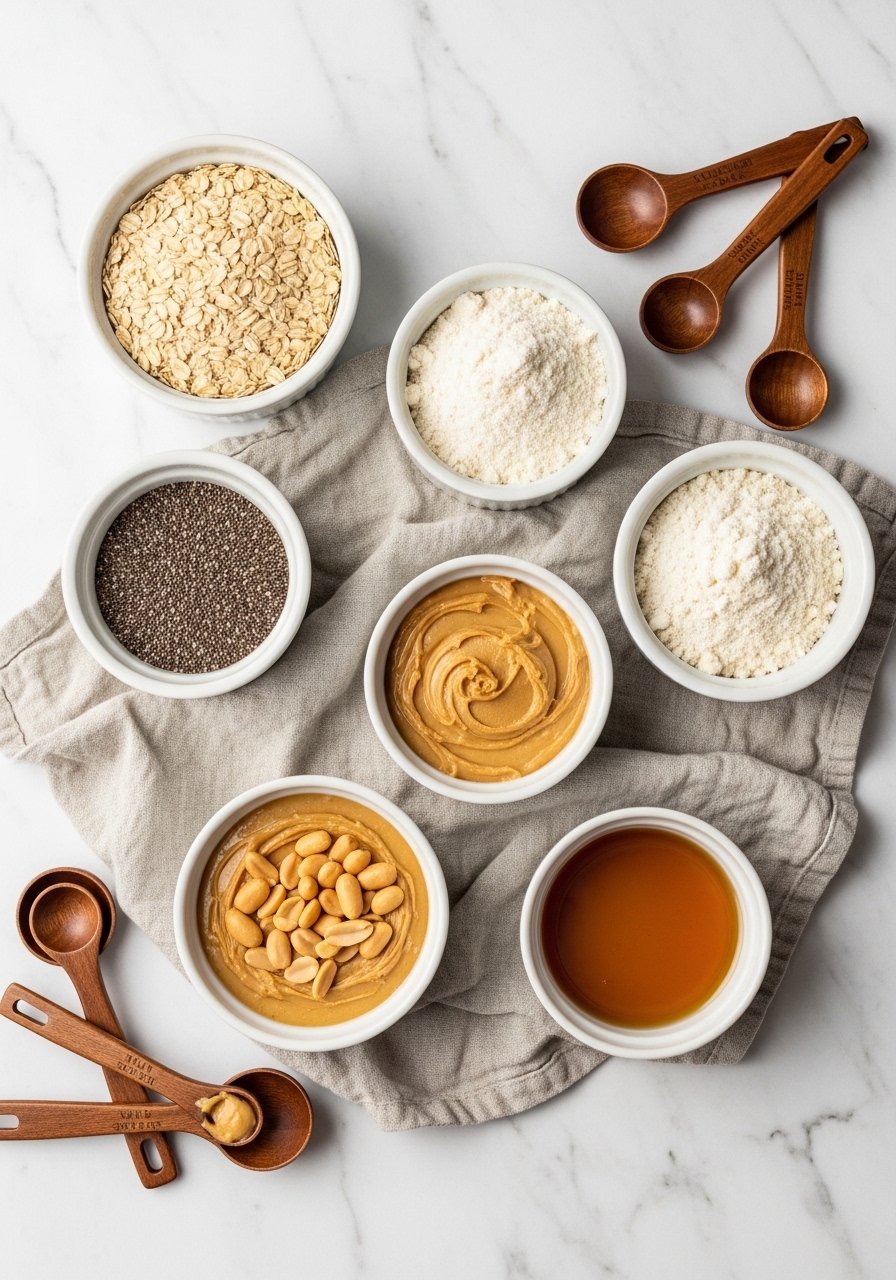
Start by assembling the core pantry staples: rolled oats, almond flour, chia seeds, natural peanut butter, and pure maple syrup. Use these base ratios for a single 8×8 pan:
- 1 1/2 cups rolled oats
- 1 cup almond flour
- 1/4 cup chia seeds
- 1/2 cup peanut butter
- 1/3–1/2 cup pure maple syrup
Quick tips:
- Toast rolled oats and chia seeds for 6–8 minutes at 325°F for a nuttier flavor and less sogginess.
- If you want gluten-free bars, ensure your oats are certified gluten-free.
Product links: rolled oats, almond flour, chia seeds, pure maple syrup, natural peanut butter.
This section solves the common pain point of "what to buy" and gives clear costs/choices for pantry-friendly swaps (e.g., sunflower seed butter for nut-free).
The Mixing and Baking Technique — How to Make Breakfast Bars for Grab-and-Go Mornings
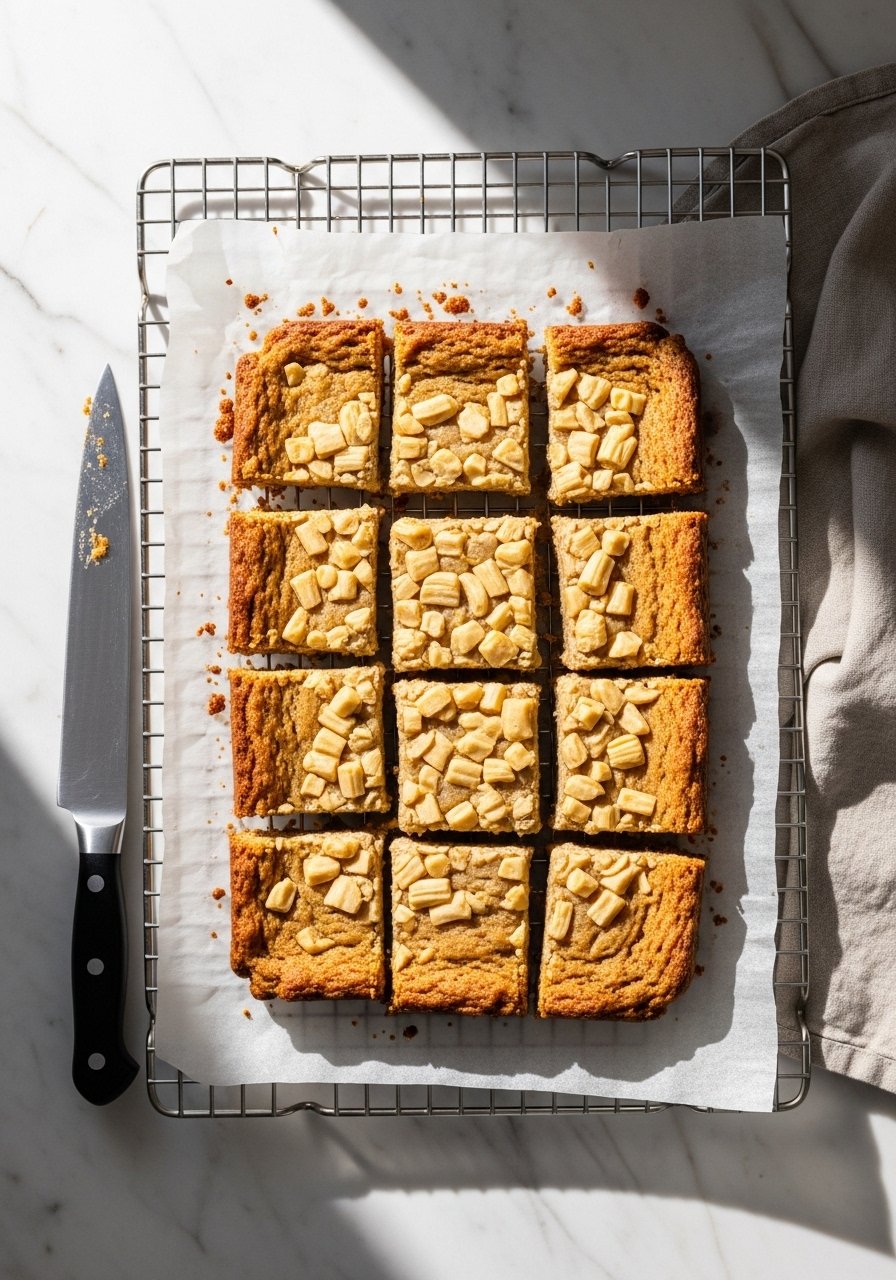
- Preheat oven to 350°F and line an 8×8 baking pan with parchment paper, leaving an overhang for easy lift-out.
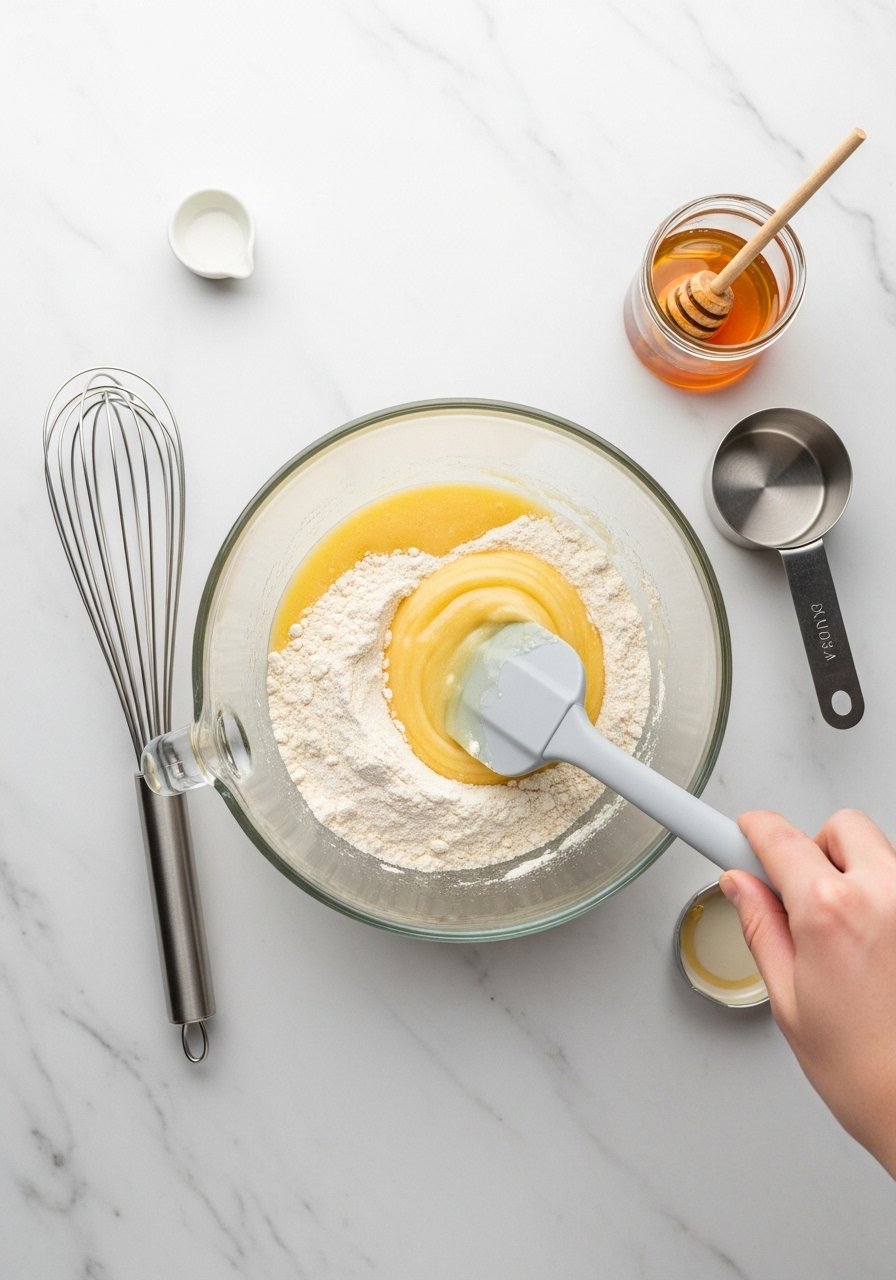
- Whisk dry ingredients, then warm peanut butter and maple syrup until pourable (20–30 seconds in the microwave).
- Combine wet + dry and press firmly into the pan for a compact crumb and crispy golden edges.
Timing and texture:
- Bake 18–22 minutes until edges are lightly browned and the center looks set but slightly soft.
- For a chewier result, bake closer to 18 minutes; for firmer bars, aim for 22 minutes.
Product tips: use a parchment paper sheet for easy removal and an 8×8 baking pan that’s non-stick. A silicone spatula helps press the mixture evenly.
This step addresses the pain point of “bars falling apart” by explaining compression, baking time, and visual cues.
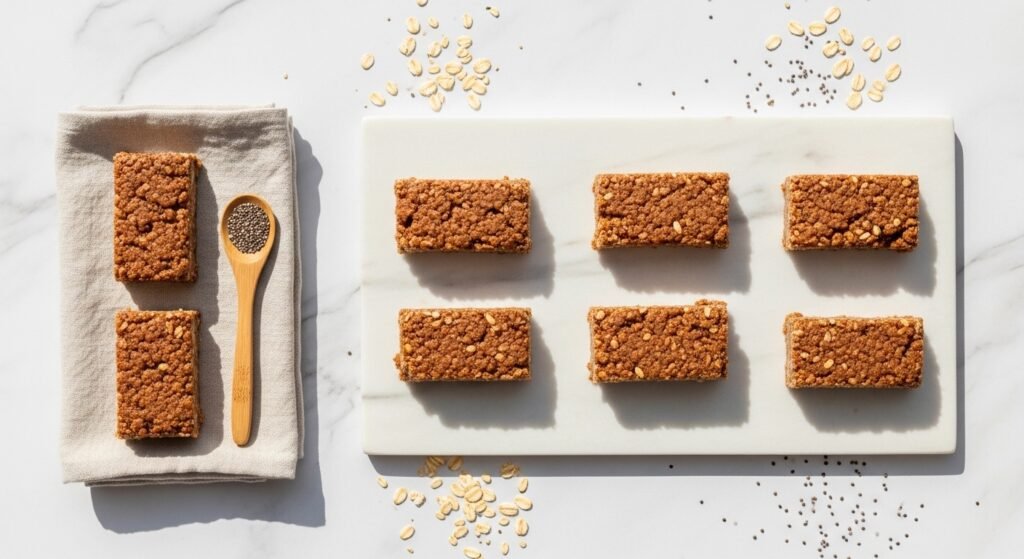
Getting the Perfect Texture and Storing for Grab-and-Go Mornings
Cooling and cutting:
- Cool completely on a wire cooling rack for at least 30 minutes; refrigerate 1 hour for clean slices.
- Use a sharp knife warmed under hot water and wiped dry for smooth cuts.
Storage and prep:
- Store bars in a single layer in glass storage containers for up to 5 days.
- Freeze extras individually wrapped in beeswax wraps or freezer bags for up to 3 months—thaw overnight in the fridge.
This covers gaps others skip: make-ahead timing, freezing tips, and precise visual cues for doneness.
Finishing Touches and Variations
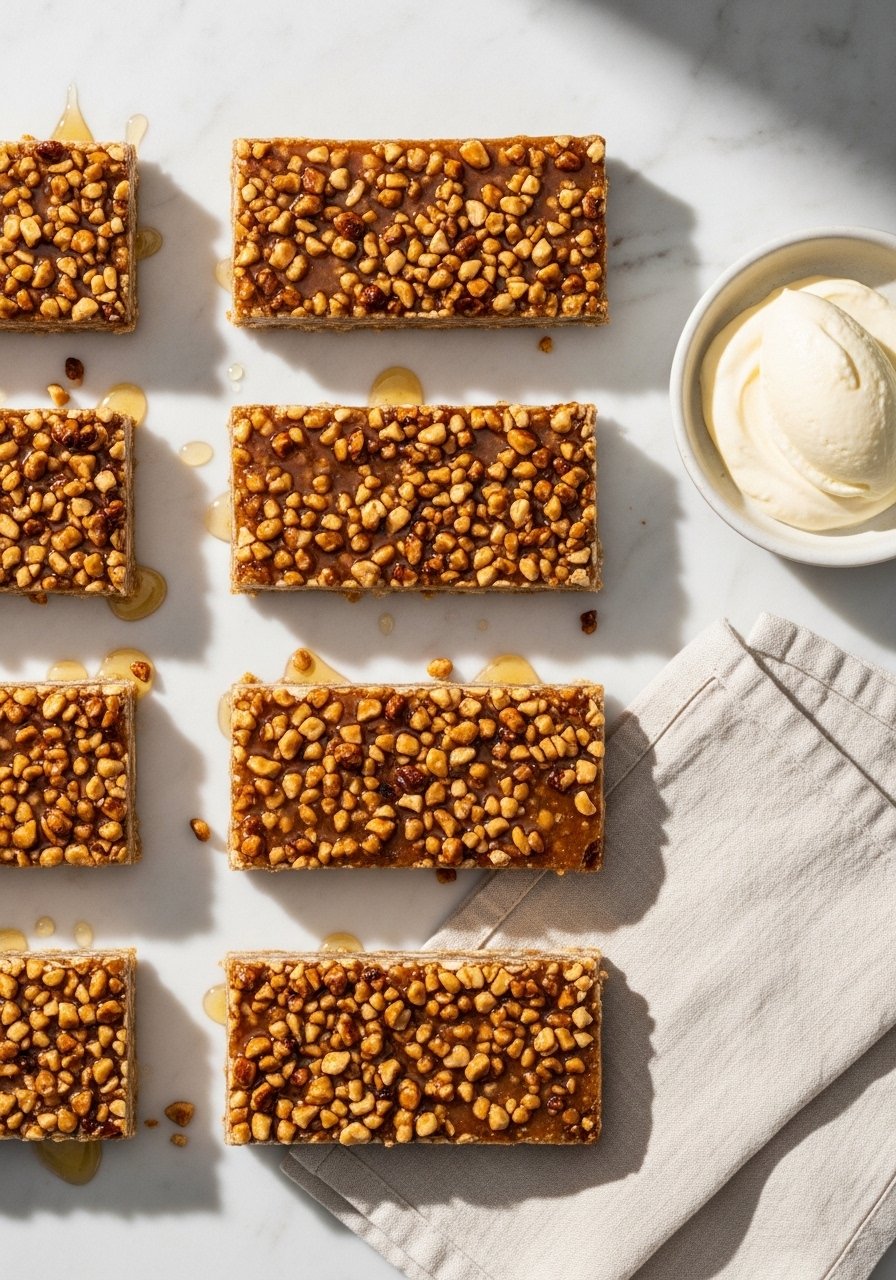
Add-ins and swaps:
- Stir in 1/2 cup chopped dried fruit or 1/3 cup dark chocolate chips before pressing.
- For lower sugar, reduce maple syrup to 1/3 cup and add 2 tbsp applesauce.
Quick serving ideas:
- Wrap bars in parchment strips or tuck into a mason jar with yogurt for a layered grab-and-go breakfast.
Product mentions: honey, vanilla extract.
Try toasting nuts first for more crunch—this lesser-known step keeps bars from going soft in storage and adds a toasted, nutty flavor.
Once you’ve mastered these steps, you’ll have a batch of breakfast bars that are portable, portioned, and pleasingly textured. Pin this guide for your next meal-prep day and share with friends who sprint out the door. Which flavor will you try first? Consider grabbing a digital kitchen scale if you haven’t already — it really cuts down on guesswork.